 Nix McRetro
The Australian Ibis is the best bird wandering the streets. I mean bush turkeys are a close second. They both overcame adversity and now excel at being hunters on Sydney nature strips. Perhaps irrelevant to this post but cool nonetheless.
Today we’re looking at a broken Fujitsu MPB3021AT hard drive with a capacity of 2.16 GB. It’s a rather noisy old thing, and I was curious to see whether there might still be some useful data on it. Unfortunately it arrived with a bit of damage before we could even begin recovering anything.
The drive was missing a crystal oscillator from the position marked X1 on the circuit board. I had a note suggesting a 32 MHz replacement, although at one point we weren’t entirely sure whether the original component was supposed to be in kilohertz or megahertz. The drive did nothing with that component missing, so we fitted a replacement to see whether it would respond.
Once the crystal was installed, the drive began making a rather impressive clicking noise. Not exactly the sound you want to hear from an old hard drive, but at least something was happening now. The component date codes included markings from early 1998, which gives us a rough idea of the era we’re dealing with.
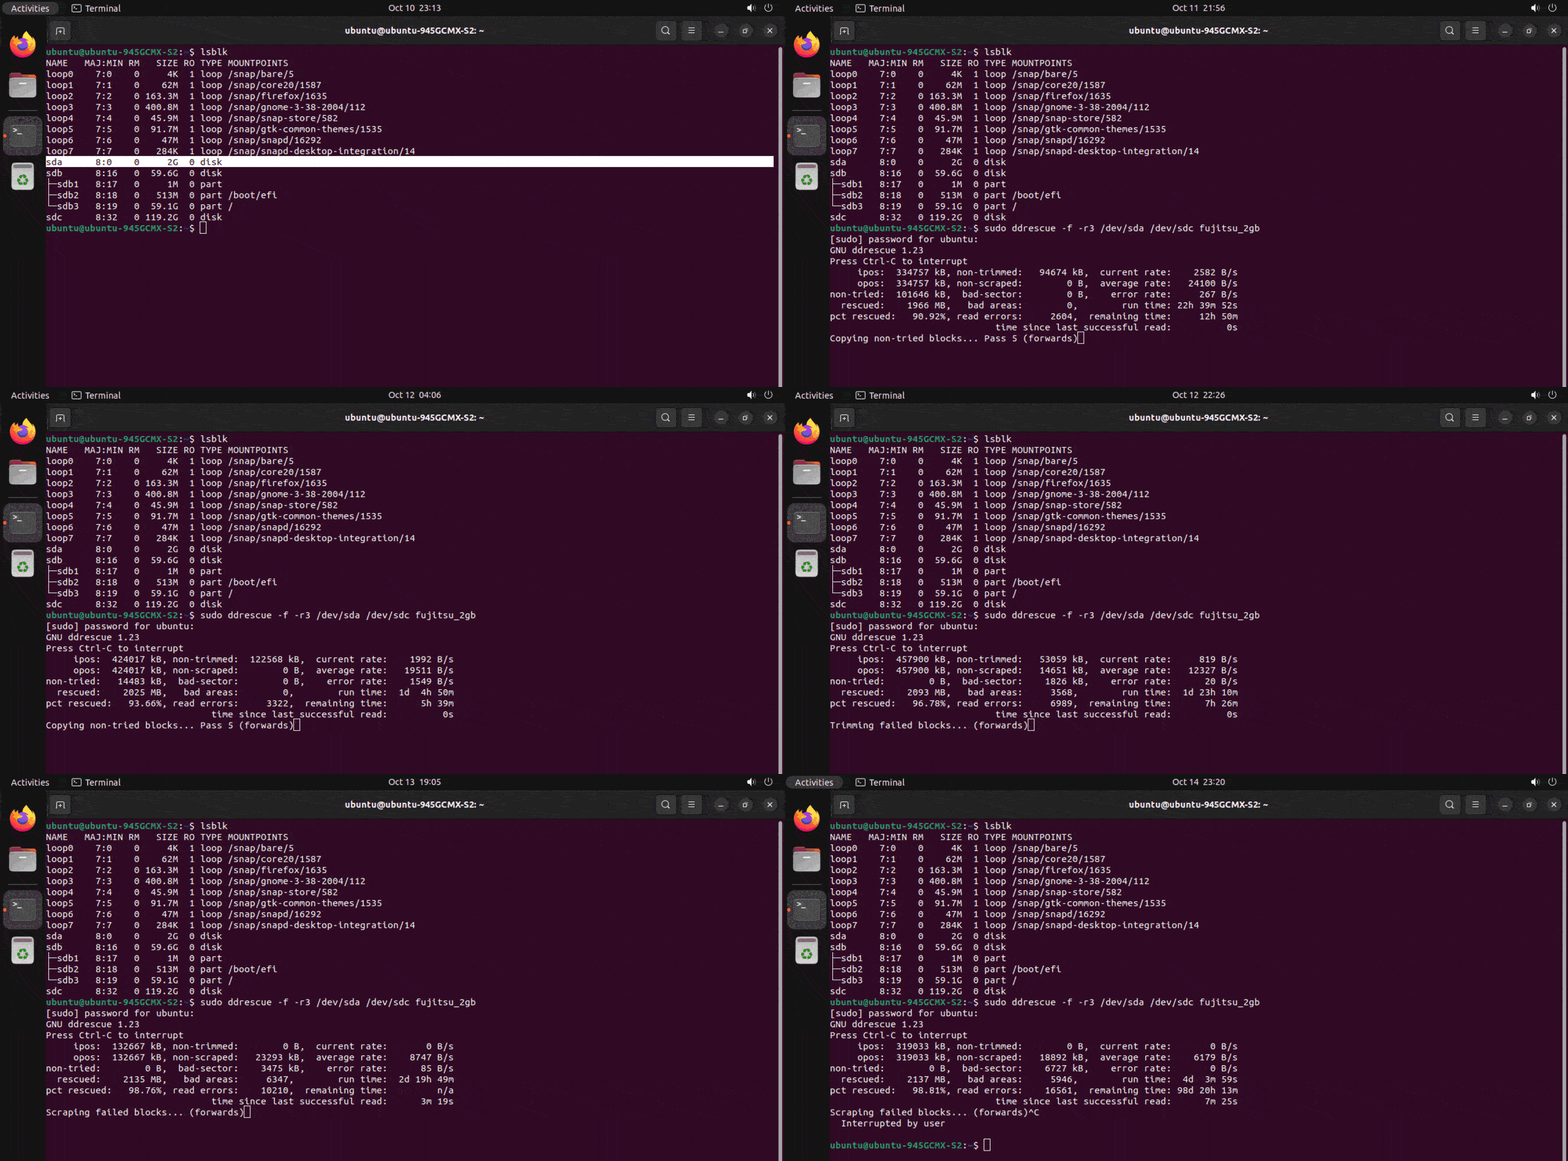
I tried using GNU ddrescue 1.23 to make a copy of the drive. The GNU ddrescue manual explains how it tracks readable and unreadable areas so a recovery can be resumed. The command below is preserved from my notes, although the device names must not be copied blindly.
sudo ddrescue -f -r3 /dev/sdb /dev/sdc logfile
The -f option permits writing to an output device, while -r3 requests three retry passes over the areas still marked bad. There’s a mismatch between my notes and the animated screenshot: the command lists /dev/sdb as the source, but the screenshot identifies the 2 GB drive as /dev/sda and shows fujitsu_2gb as the mapfile. Both show /dev/sdc as the destination.
The mapfile records the recovery state, allowing ddrescue to resume without starting again. These were the device names from particular experiments, not instructions for anyone else’s machine. Always identify the actual source and destination before attempting a recovery.
The destination drive was itself a failing SSD. Wonderful choice, I know! That gave the recovery another possible point of failure, because a write error on the destination could interrupt the whole process. A healthy destination or an image file would have made considerably more sense.
I left the recovery running for roughly four days, listening to the Fujitsu clunk away. There were unreadable sectors, and progress eventually became painfully slow, so I interrupted the attempt. Another option would have been an initial pass using -n, or --no-scrape, to avoid spending so long on difficult areas before recovering as much of the readable data as possible.
Older ddrescue examples can be confusing because version 1.19 replaced the old splitting process with scraping and changed the meaning of -n. The ddrescue cloning guide and Linux.com’s GNU ddrescue article give some background.
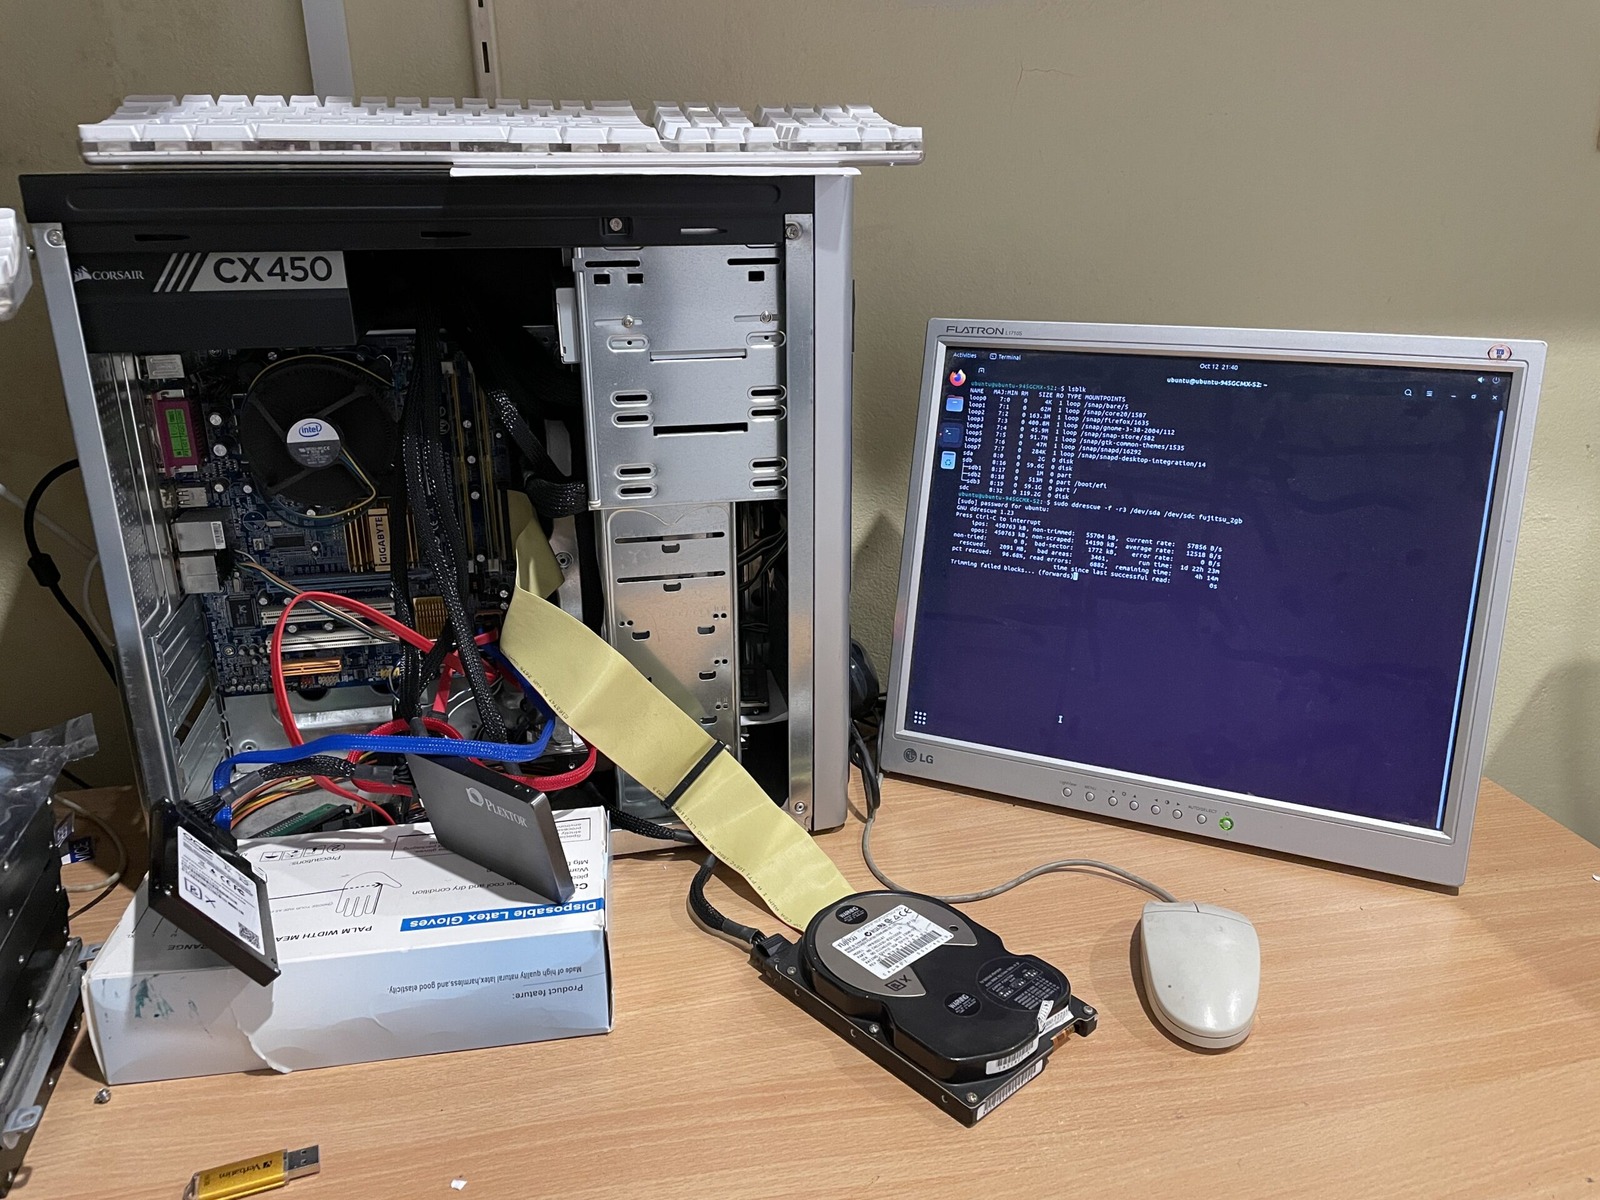
The test computer used a Gigabyte GA-945GCMX-S2 motherboard. I’ve found these old boards handy for working with PATA and SATA drives, and I’ve got rather fond memories of the Intel 945 chipset from my Hackintosh days running Mac OS X Snow Leopard. A proper retro PC, complete with a ball mouse!
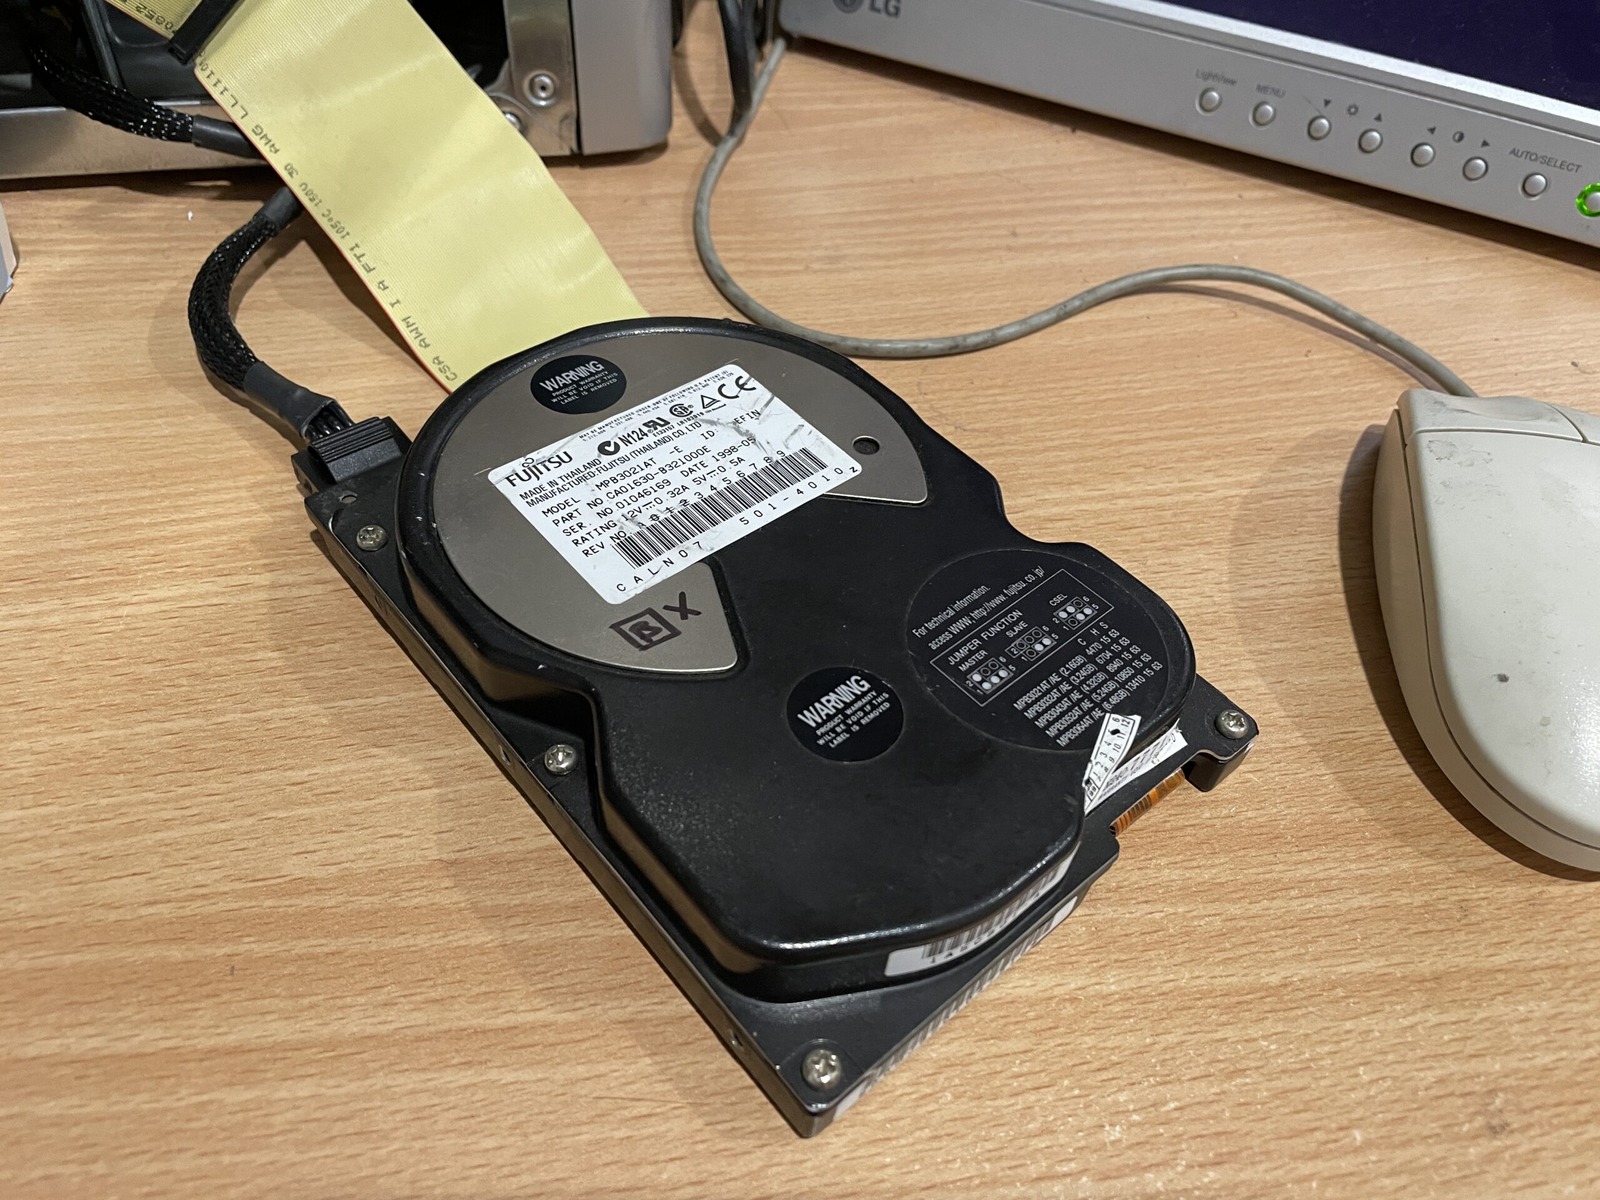
Here’s the Fujitsu drive itself. It certainly looks like a 2 GB hard drive and sounds like one too. Fujitsu’s MPB3xxxAT product manual is still available, which is rather handy when you’re trying to identify missing components and other details. Good guy Fujitsu.
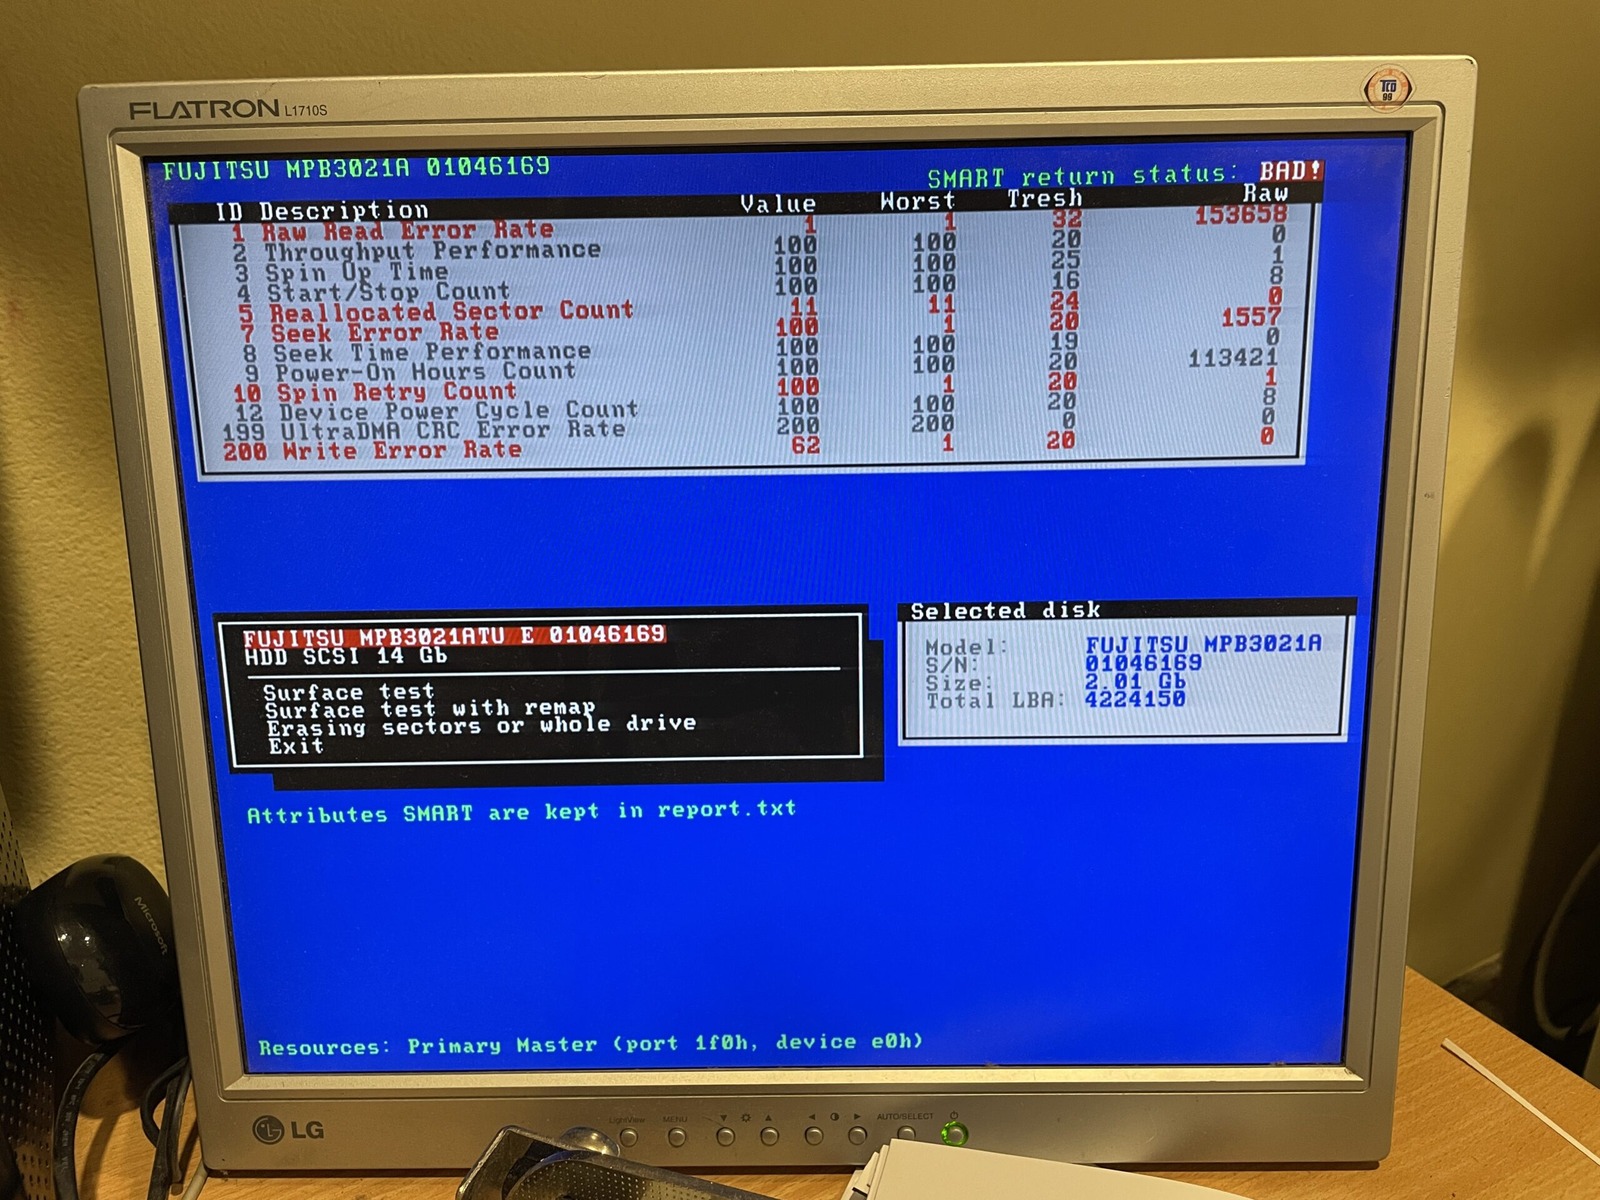
The SMART statistics weren’t particularly happy after several days of recovery attempts. That’s hardly surprising considering the noises the drive had been making and the trouble we were having reading its contents.
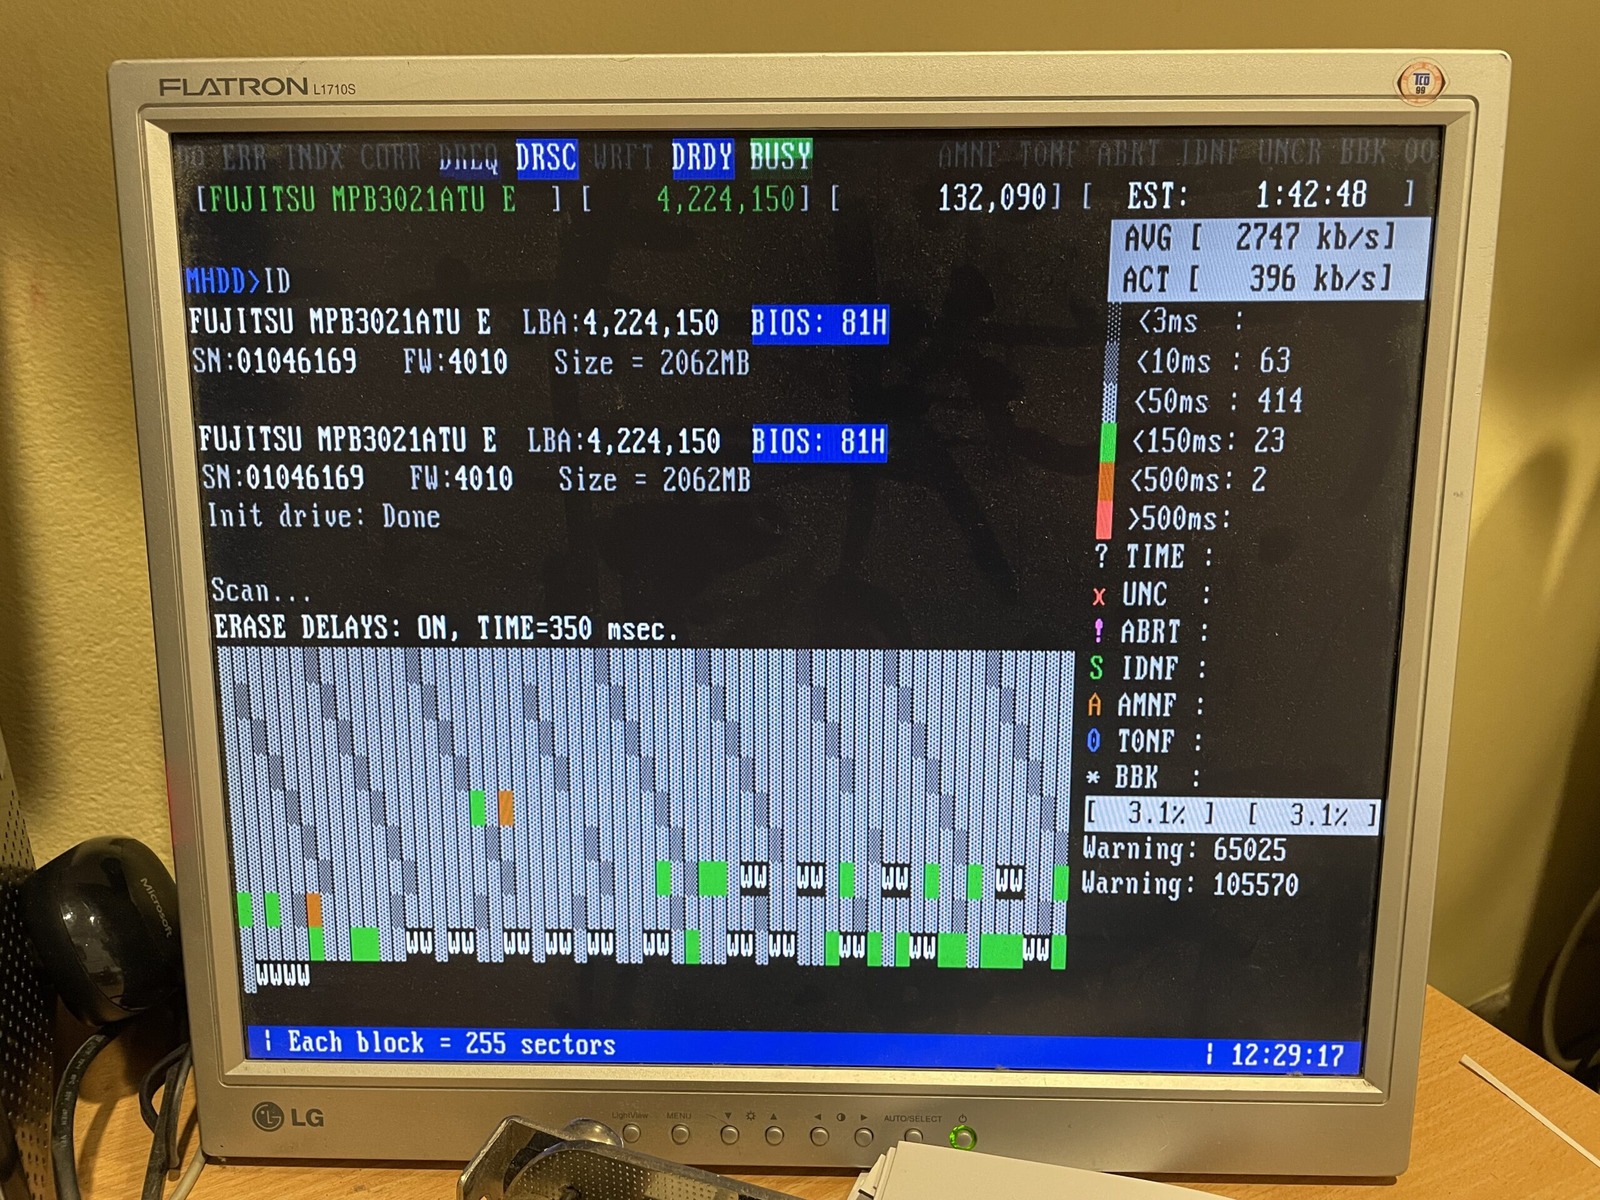
Before the destructive erase, I also ran pattern searches against a disk image created with ddrescue, but found no signs of deleted data that hadn’t been zeroed. After the recovery attempt I used MHDD to examine the drive further. It started showing warnings quite early on, and I also experimented with its erase function. That operation is destructive, so anything examined after that point can’t tell us what recoverable data might have existed beforehand.
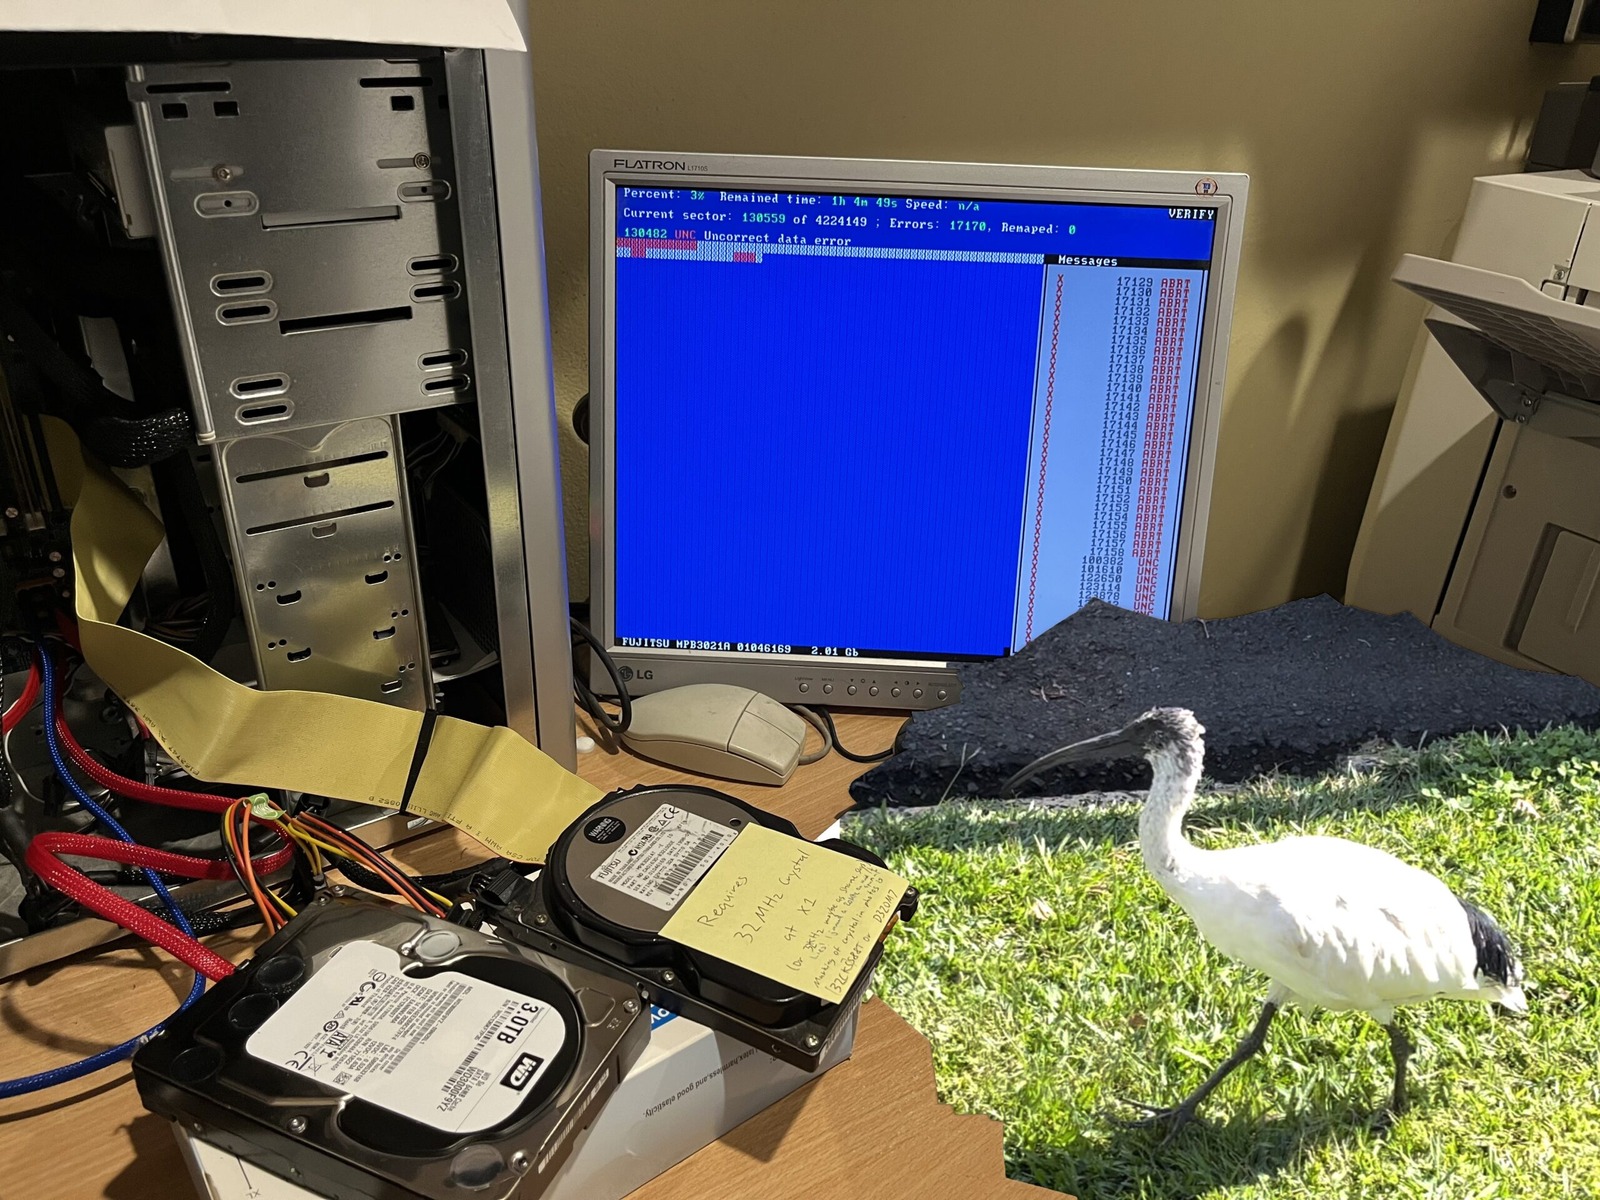
Ultimately the data recovery was a bust. There either wasn’t anything useful left, or the drive was too far gone for us to retrieve it. We didn’t recover usable data before the destructive testing began, although it cost nothing to try and was interesting to hear the old Fujitsu clunking away for a few days. The takeaway? Make a backup today if you haven’t already! 😎
Sources