 Nix McRetro
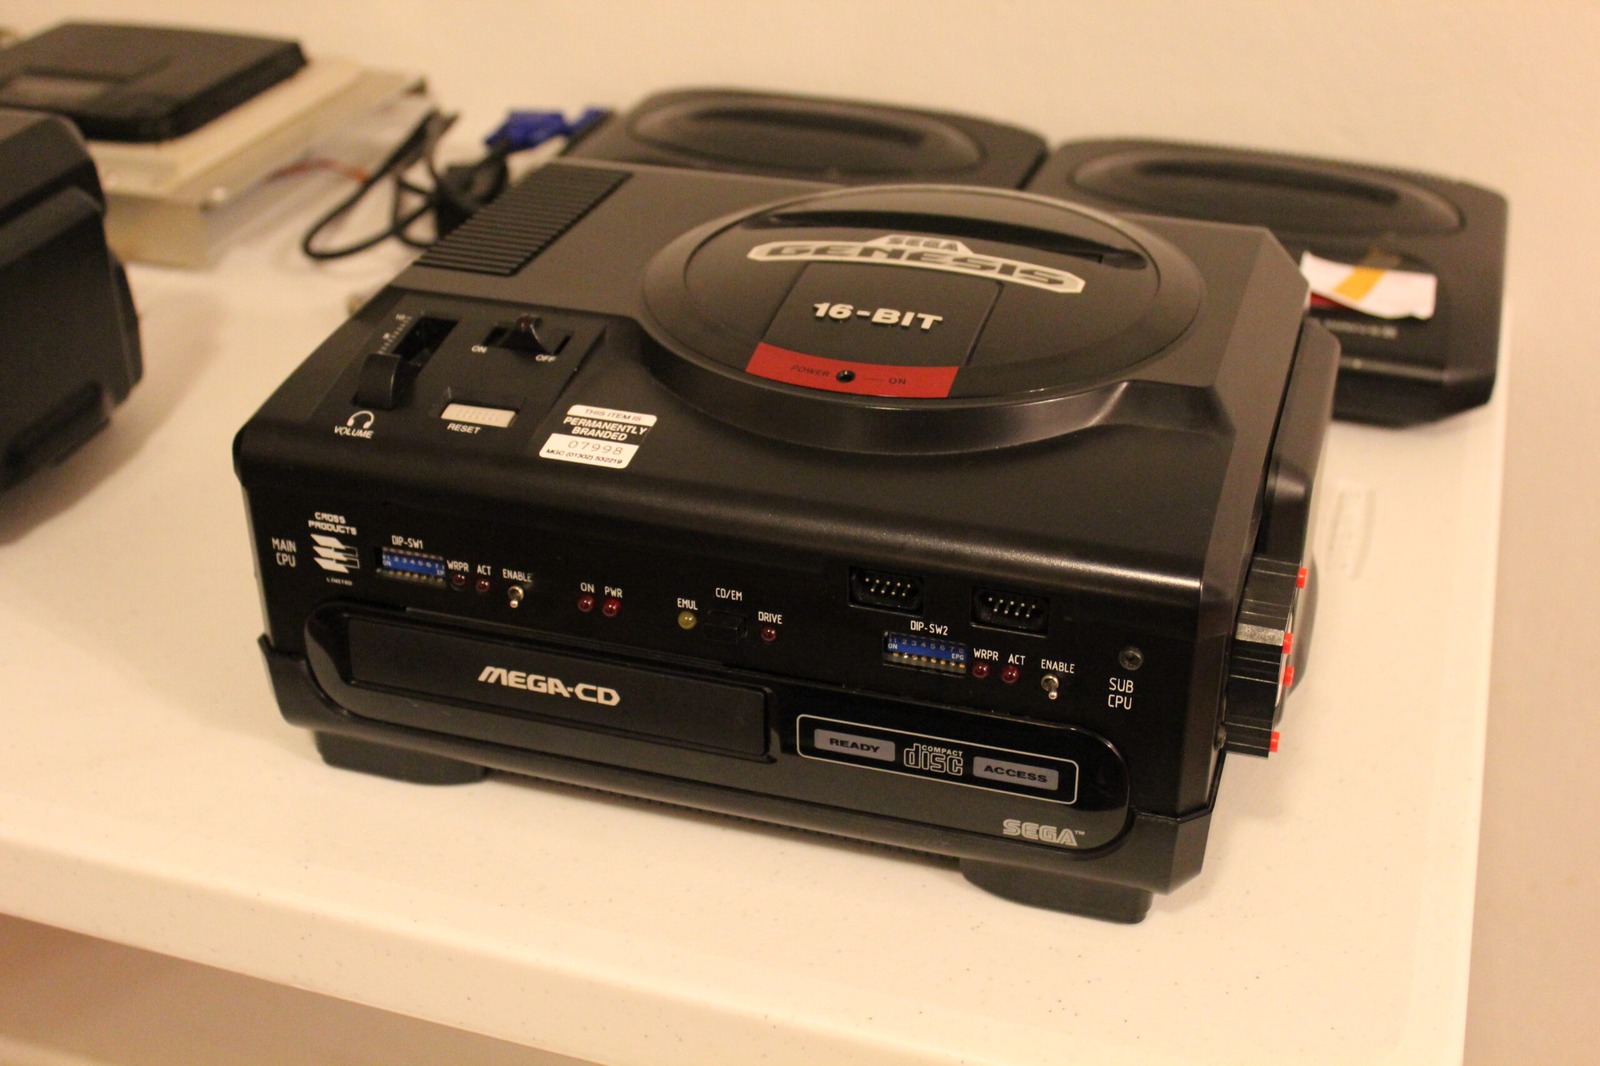
The Cross Products SNASM Mega-CD development unit, serial MCD01/0174, is our next target for disassembly and photography. This is one beefy devkit! I’ve spent a bit of time experimenting with the software side of the system, and now it’s time to see what’s actually inside.
The SNASM Mega-CD was built around modified Mega Drive and Mega-CD hardware, with additional development electronics packed inside. At first glance, the upper part looks like an ordinary Genesis case that’s been adapted for development use, with extra brackets, connectors, and metalwork everywhere. Underneath it all is a PAL Mega Drive board. They’ve really modified a perfectly good console to make this thing!
The case has several mounting brackets along the sides, with screws that aren’t where I’d normally expect them. It quickly became apparent that removing the top wasn’t going to be as straightforward as opening a retail Mega Drive. I also found date markings from 1992 on some of the components, which is interesting to see on this early development hardware.
Once the upper assembly was out, I could start examining the additional boards and ribbon connections. Cross Products managed to sandwich more development hardware into the machine without making it as tall as I would have expected. The Mega Drive’s 68000 processor is present in a quad flat package, with extra connections running between the console hardware and the development circuitry.
The Mega-CD section is another adventure entirely. There are ribbon cables and an adapter arrangement around the CPU area that wouldn’t be present in an ordinary retail machine. The system could also interface with dedicated CD-emulation hardware, allowing development data to come from the PC instead of relying entirely on physical discs.
Inside, there’s all sorts of extra wiring, tape, and modifications that make it considerably less tidy than the outside. I even found a fuse where I’d become accustomed to seeing a soldered connection in some other Mega-CD hardware. It’s interesting discovering these little differences, although the collection of screws, bolts, boards, and cables is getting rather impressive.
At this point I’m beginning to wonder whether I’ll ever get the thing back together! I’ll probably finish photographing everything later this month or early next, with the results eventually finding their way into the photo gallery. I hope you enjoy poking around inside this one as much as I’ll enjoy trying to remember where all the screws went. Errr… just kidding?
Sources
Related Posts