 Nix McRetro
First up we have some test desoldering of a RAM chip off a RAM chip board to see if this would even work using a heat gun.
Next we have part one desoldering the quad flat package (QFP) 386SX on the Amstrad Mega PC.
And lastly part two where everything fell apart.
As you can see we started off with a quick desoldering recap and then went straight for the big guns. 29 minutes of hope and anticipation crushed in the last minute. Not the best result, but it shows that anything is (not) always possible if you put your mind to it. There are usually a lot of prerequisites and I am sure I missed a few on this one.
Overall the soldering wasn’t a complete failure as it taught me some of the finer points of how to solder QFP chips to a motherboard. It also taught me a fair bit about desoldering things from boards as well. The following photos are the key points and there’s always more in the photo gallery.
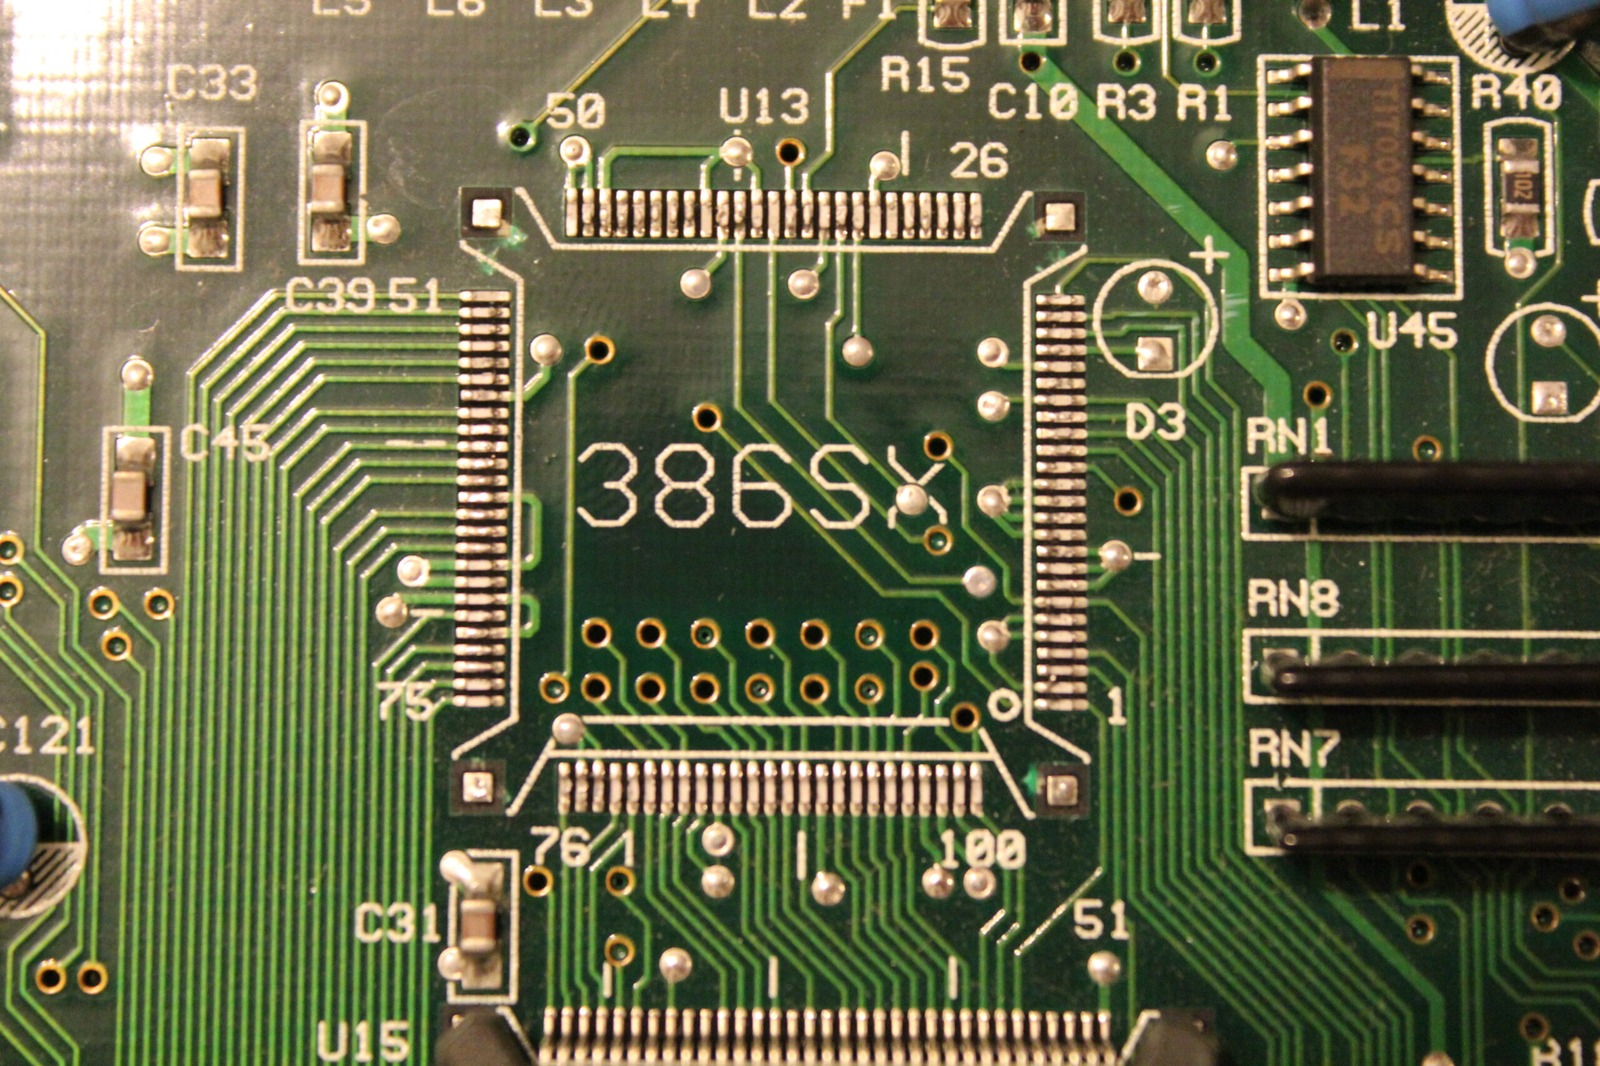
Where the 386SX chip sat.
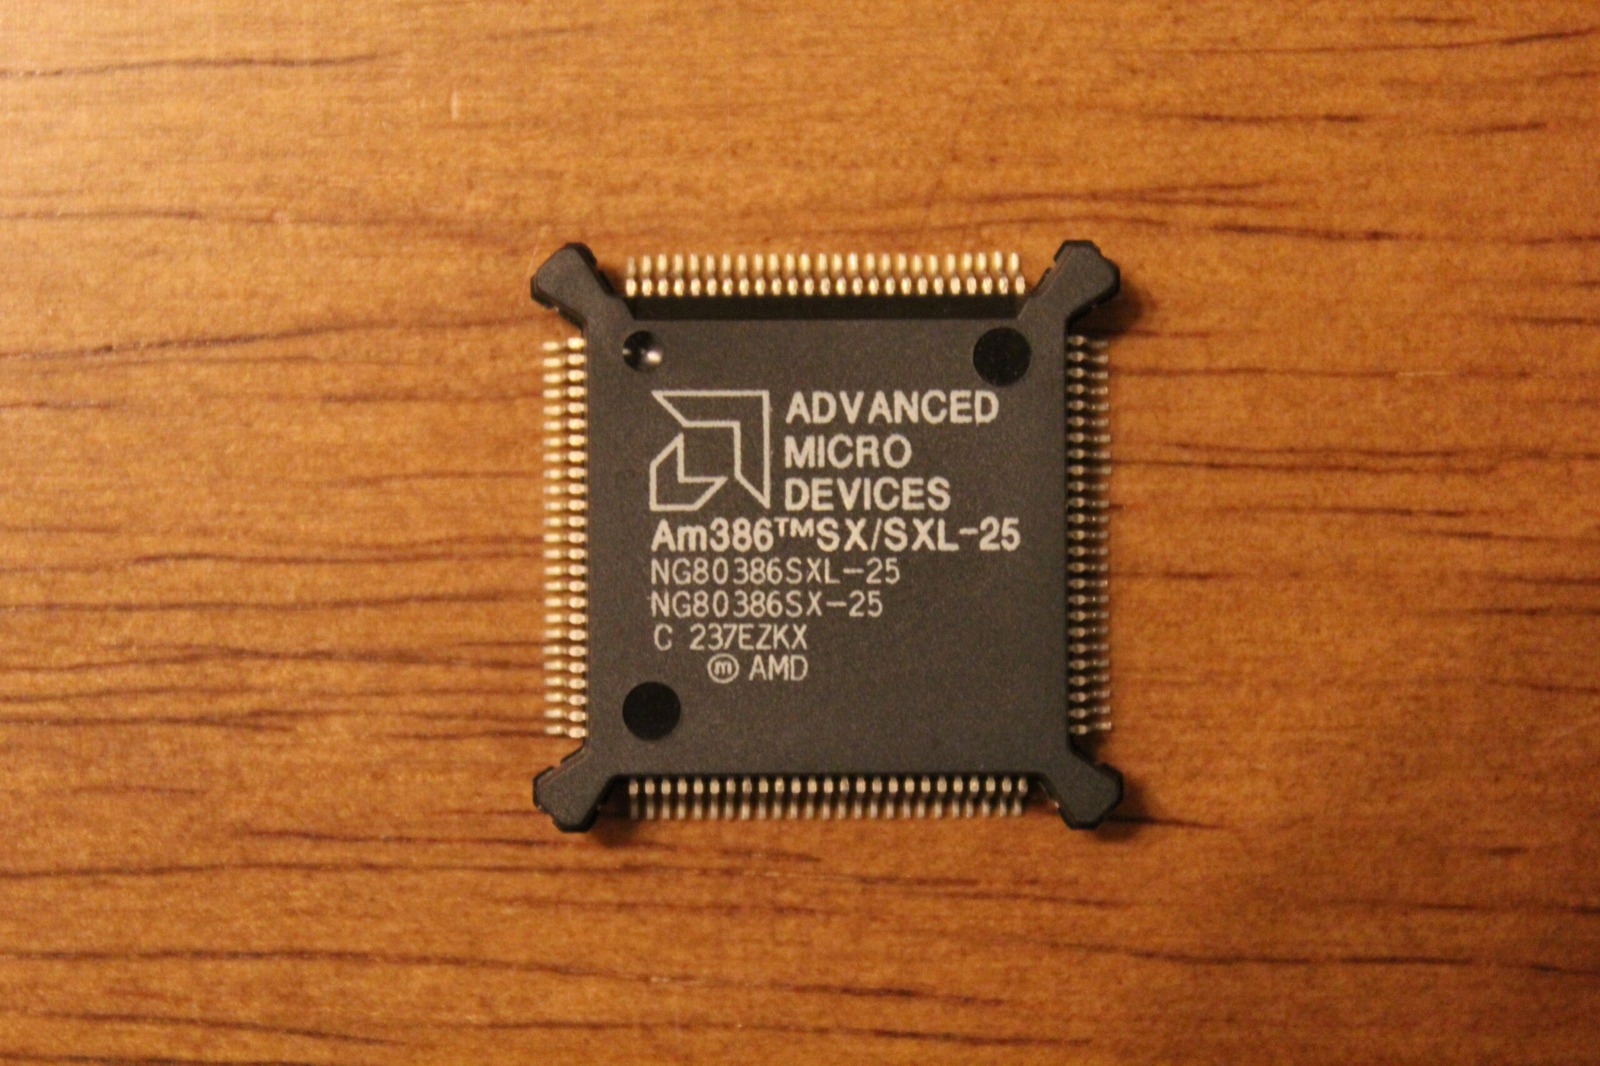
The original chip.
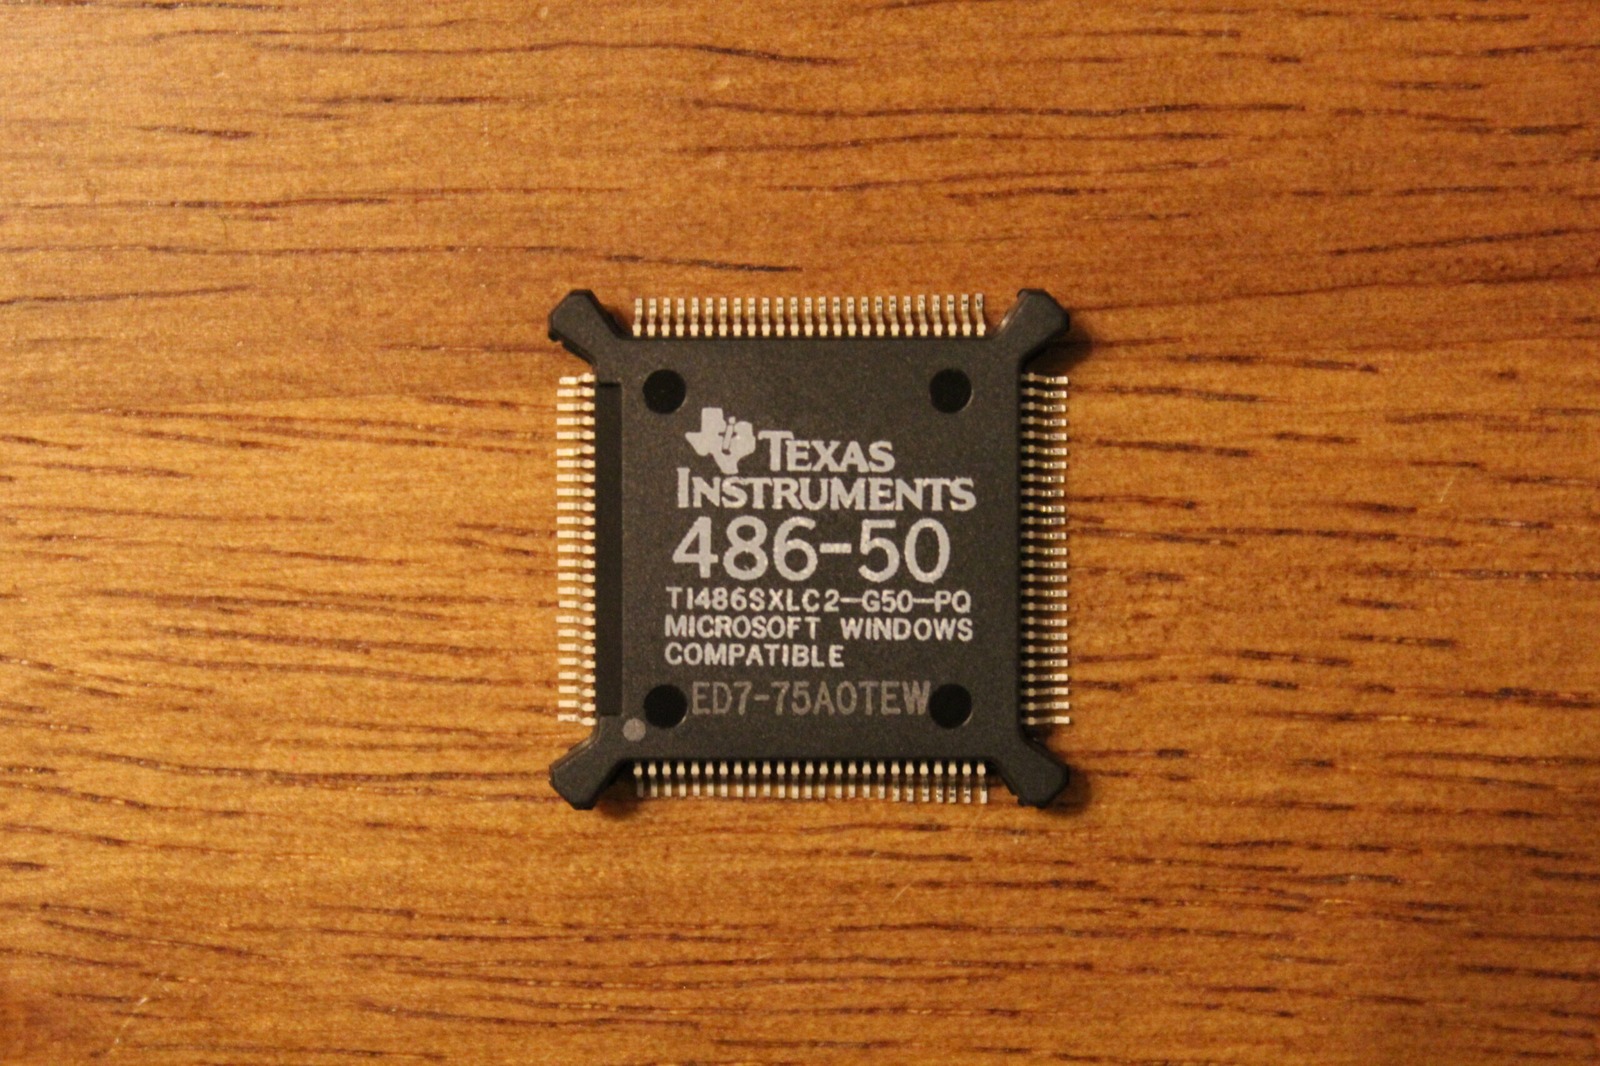
The replacement chip.
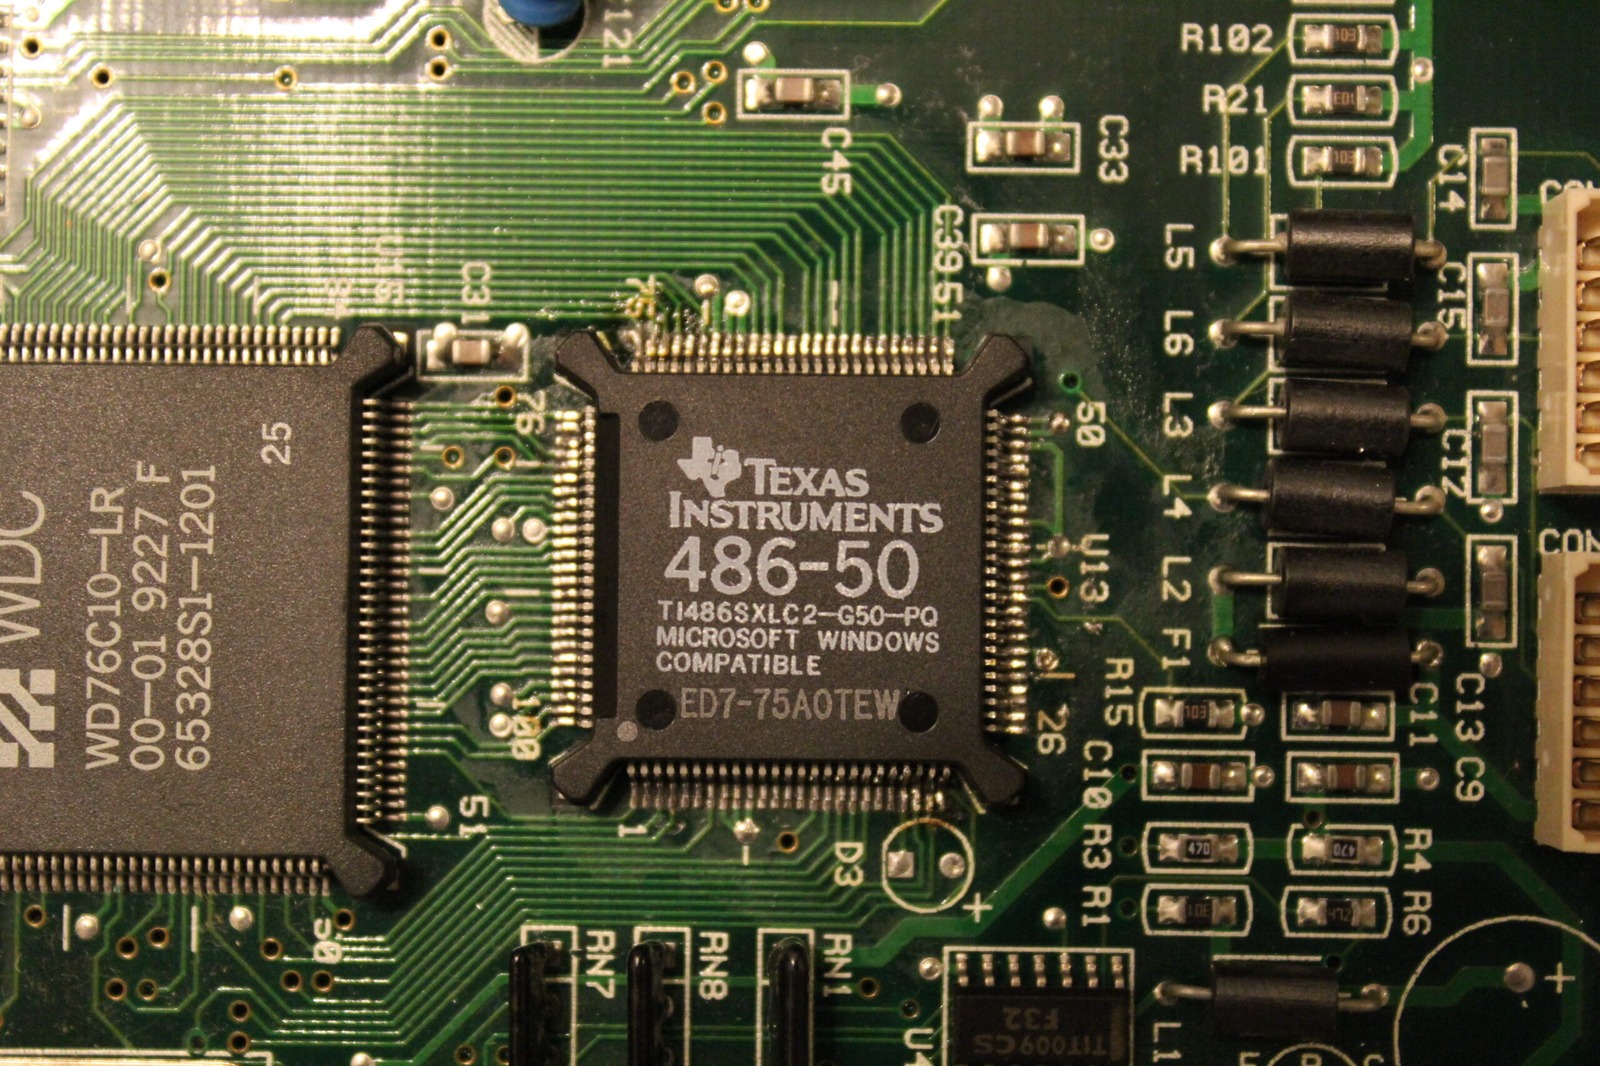
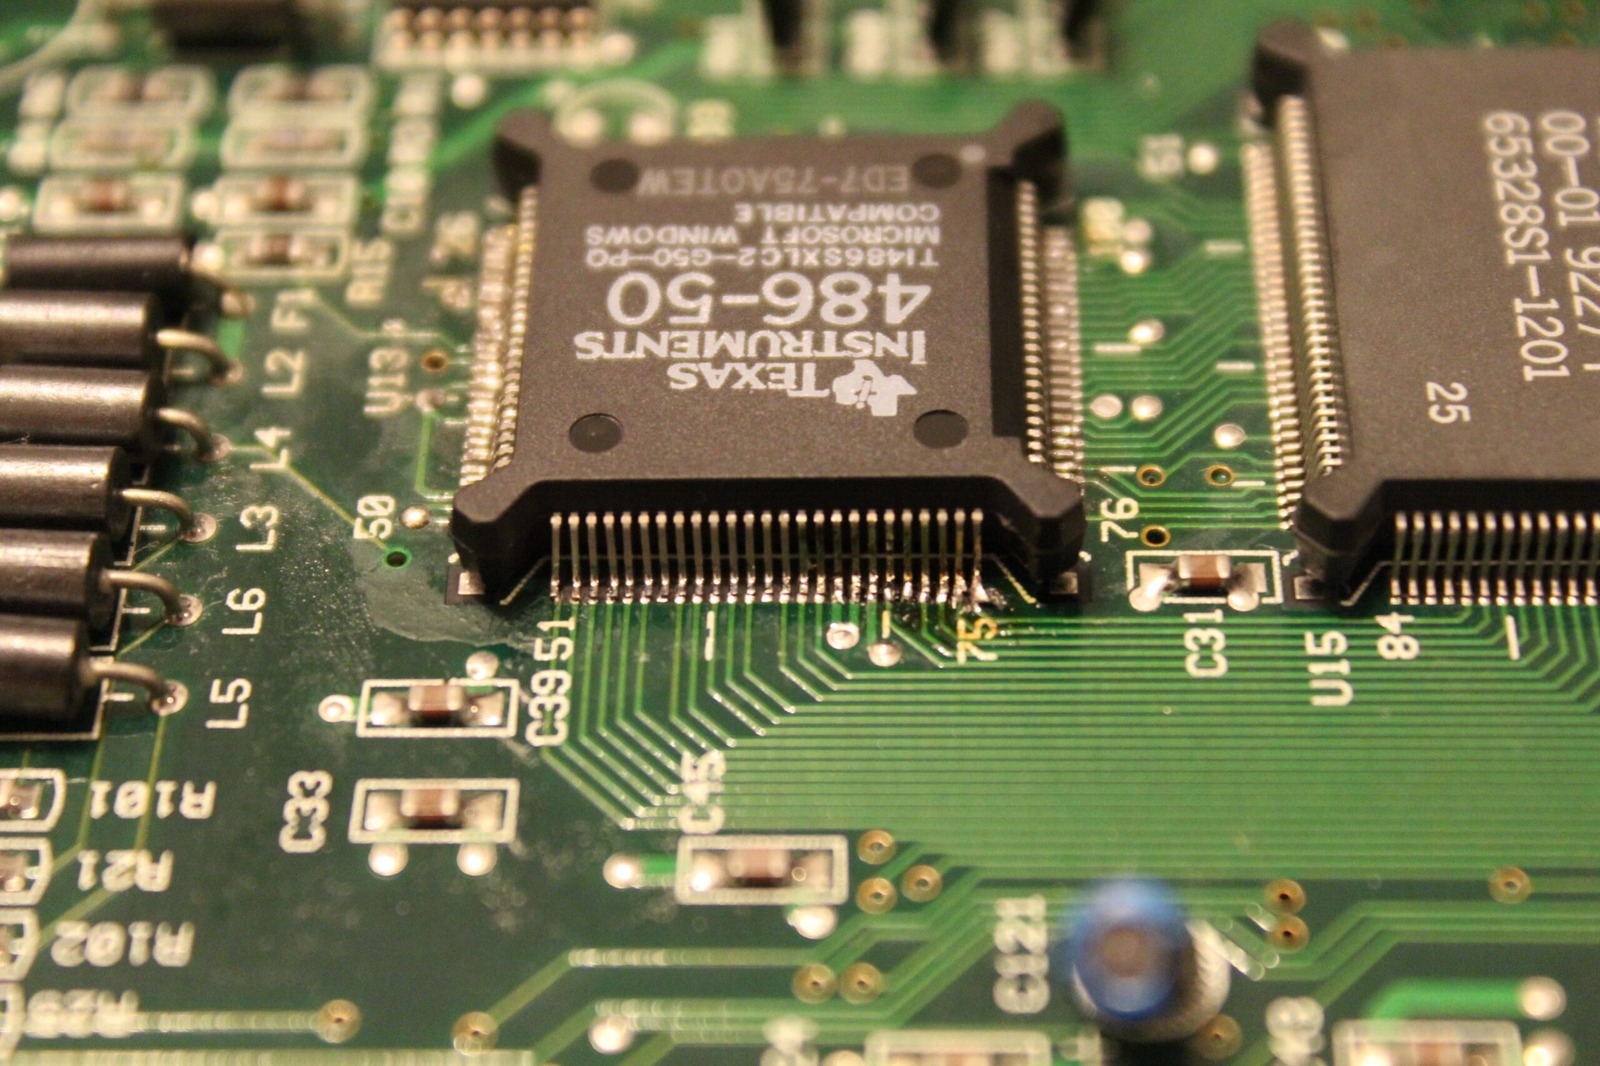
Some of the finest drag soldering this side of the ‘verse.

At least now I know that the 486SLC board is permanently installed into the Mega PC as there is no reverting back to the old board now… I’ve scrapped the board and plucked off all the possibly useful chips. I took some decent photos of the board and major components before doing this. See below for more. Photos of both the 486SLC and 386SX can be found in the photo gallery.